Wednesday 11 December 2013

BONSAI TREES AVAILABLE FOR SALE

YOJI  BONSAI  CANADA

Welcome to Yoji Bonsai Canada. We have many beautiful creations for you to choose from. Junipers, Ficus, Boxwood, Maples, Japanese Cedars, Hemlock, Cypress, Pagoda and almost any other bonsai you may request. All my bonsai are young/ infant( Yoji means infant in Japanese ) so they will become yours to care for from the start. Share your pics and thoughts with us. I started bonsai as a hobby and now want to share with everyone. Everything you see is for sale. All prices are very reasonable between $25.00-$45.00 per bonsai. We apologize if items are sold and not yet removed from the site. Thanks for your support. Feel free to get in touch with us via email  yojibonsai@gmail.com or call (604) 999-9763 for prices and info.


FISHERMAN WATER SCENE. HALF POT FILL WITH WATER
TREE IS A JAPANESE PAGODA ( HOLLY)


                                                              BLUE STAR JUNIPER


                                                                   FICUS TREE


5 INCH  JAPANESE CEDAR


HEMLOCK


6 INCH    JAPANESE CEDAR


BLUESTAR JUNIPER


FICUS  TREE


WATER THEME W/ JAPANESE PAGODA HOLLY


                                                                      BOXWOOD


                                                                EVERGREEN


                                                            5 INCH  CYPRESS


                                                                BLUESTAR JUNIPER


CYPRESS


BLUESTAR  JUNIPER


CARPET  JUNIPER
STILL HAS SHAPING WIRE ON. WIRE REMOVED WHEN PURCHASED.


ALL BONSAI ARE FOR SALE  INQUIRE AT ABOVE EMAIL ADDRESS


Thursday 10 October 2013

5 basic tips for indoor bonsai care


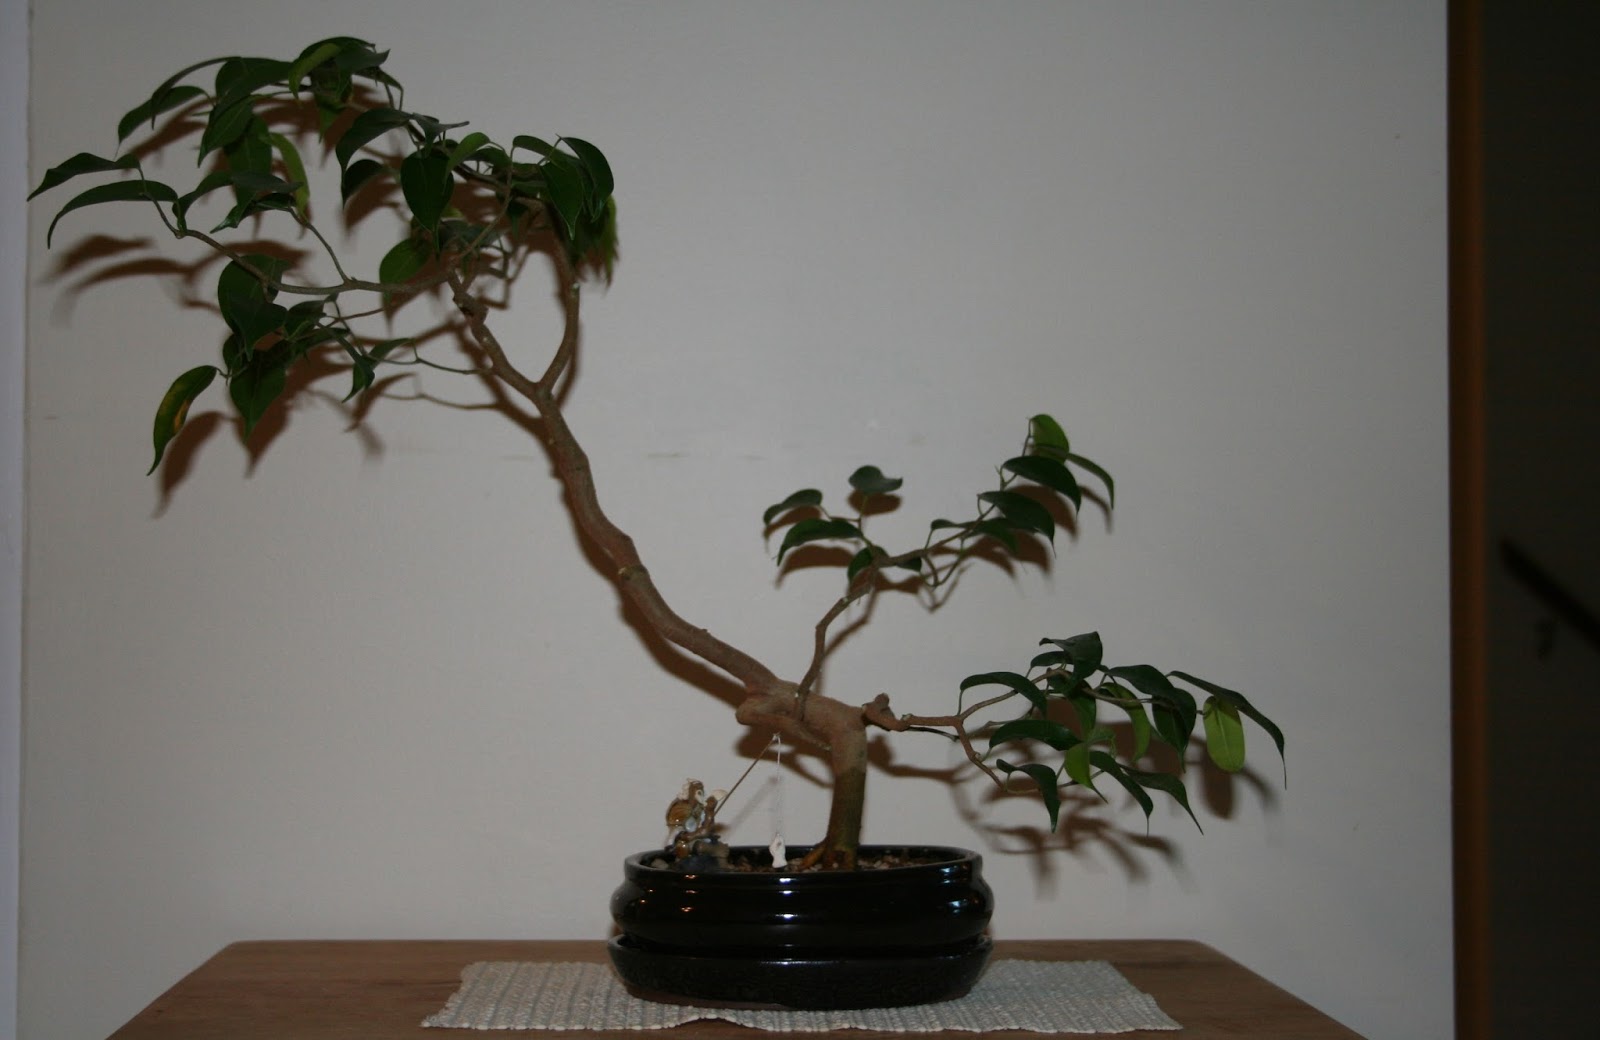
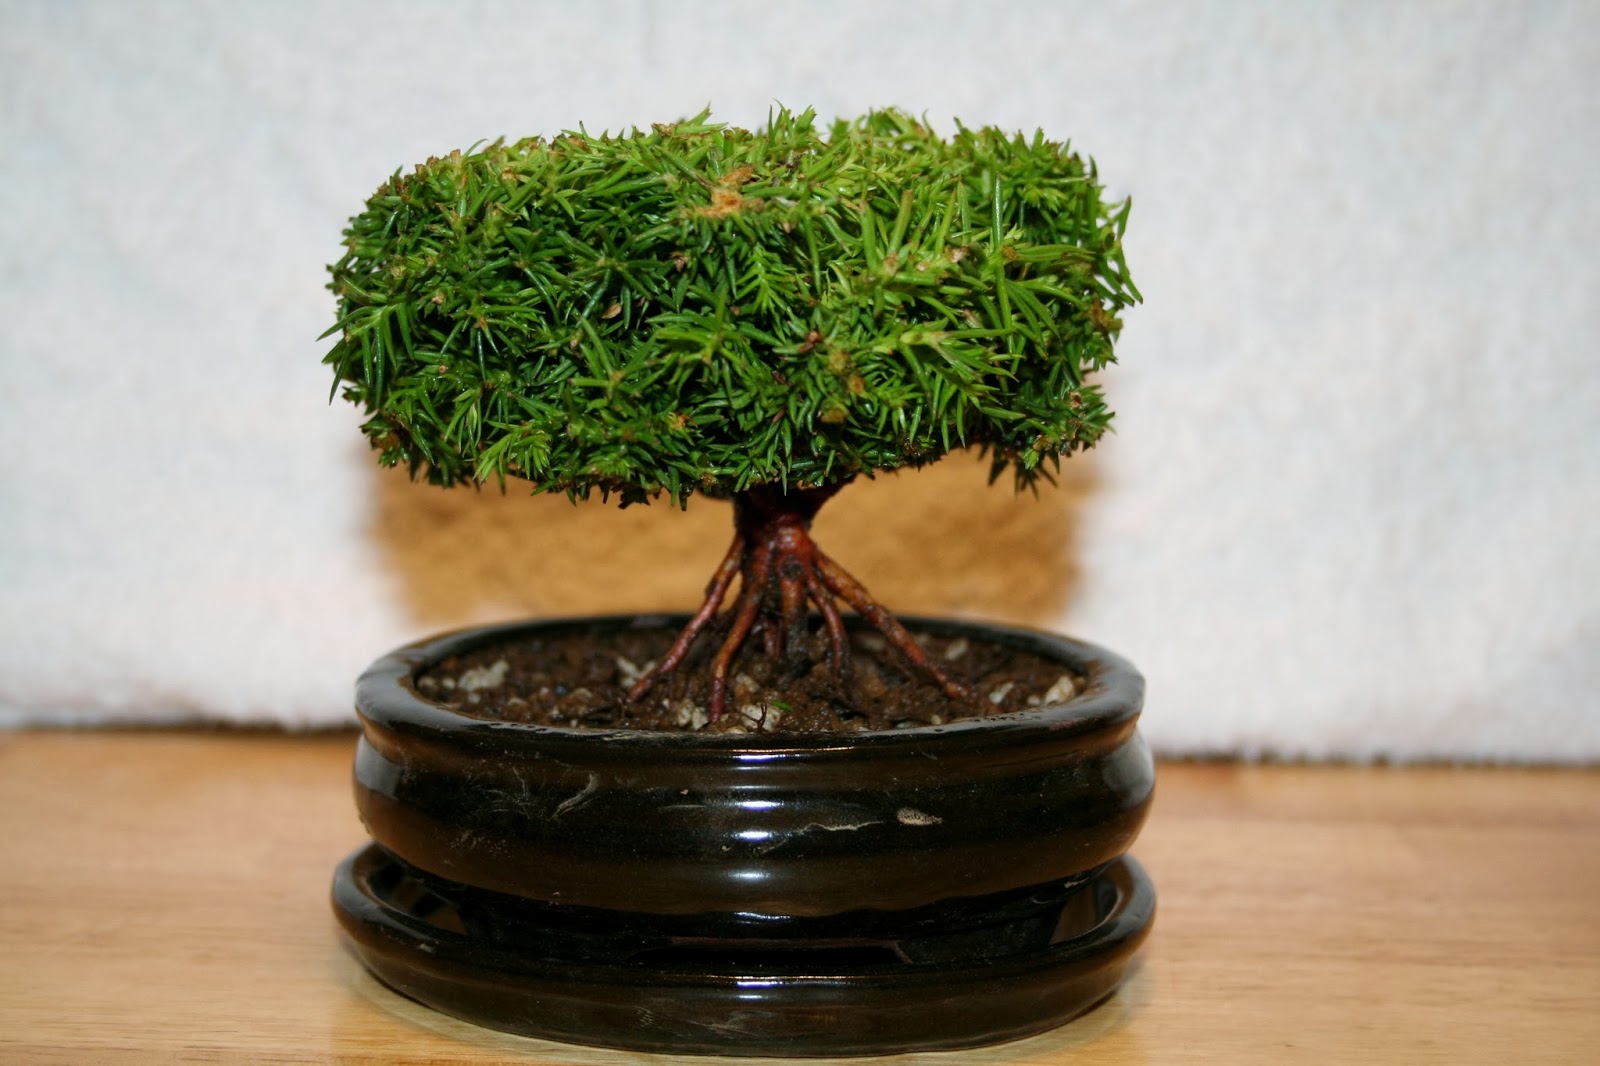
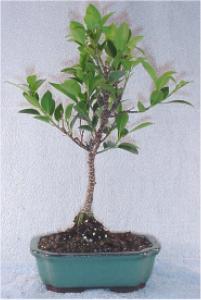
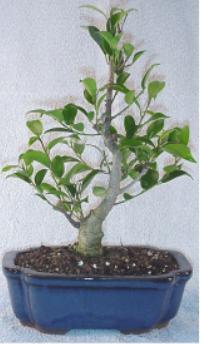
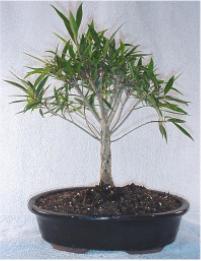
5 Top Indoor Bonsai Tree Care Tips


Bonsai tree care can be nerve-wracking and more so indoor Bonsai tree care. With proper care, you will find your Bonsai tree dying and a hobby that was suppose to be relaxing
and peaceful turns into a nightmare. Different people have different take on the proper way to care for Bonsai trees, and this document is an endeavor to list the 5 top indoor Bonsai tree care tips that are extremely essential. By following the tips, you will be able to grow great looking Bonsai trees and will no longer have to confront a dying Bonsai tree.

Although the tips here may sound very basic, without following them, you will not be able to encourage the growth of Bonsai trees. These are the basic needs of every Bonsai
tree in order for it to develop. You can like Bonsai care to building a house -- a house needs a firm and solid foundation before you can erect a wall and a roof. These 5 top
indoor Bonsai tree care tips should be the foundation of growing great looking Bonsai trees.

So, without much ado, here are the 5 top Bonsai Tree Care Tips.

Tip 1 -- How to water a Bonsai tree.

When it comes to indoor Bonsai tree care, watering is one of the most important aspects of care. If you give your tree too little water, it will dehydrate and die. If you water too
much, it will drown the tree.
After of talking to other Bonsai enthusiasts, I have found out that watering the Bonsai tree is the number one problem most people face, especially beginners. To ensure you are
watering your Bonsai tree correctly, wait until you see the soil drying up. Of course, do not wait until the soil has dried up completely. Then water the plant until the excess water
seeps out of the bottom of the Bonsai pot and then do not water again until the soil starts drying up. This is the best method to water a Bonsai plant and if you follow it, it will be
impossible (well nearly impossible!) to over water or under water the tree.

Tip 2 -- Picking the Right Soil

Picking the right soil is important for indoor Bonsai tree care given the fact that fact of the tree is covered by soil! If you want to pick the right soil for your Bonsai tree, visit the
nearest garden center and inform them about the exact type of Bonsai tree you have. The garden center will help you select the right soil and the only thing you should request is
for the best quality soil available for your type of Bonsai tree. Spending a few dollars extra for higher quality soil will make all the difference in your Bonsai tree.

Tip 3 -- How to Apply Fertilizer Correctly

Anyone who is new to indoor Bonsai tree care invariably has an issue with fertilizer application. In fact, many beginners end up using insoluble fertilizer and then are kept
scratching their head wondering why the tree died a few weeks. Bonsai trees have to be given water soluble fertilizer once or twice a week and that too only during the growing
season. In addition, fertilizer application should take place when the soil is wet or you will not see the results. Drive down to the local gardening center and inquire about the
different types of water soluble fertilizers they have. Pick a high quality fertilizer and if it does not work, wait until the next growing season before trying a different fertilizer. As
far as possible avoid mixing and matching fertilizers.

Tip 4 -- How to Prune a Bonsai Tree

Pruning is an important part of indoor Bonsai tree care. The pruning is done in two different ways -- branch pruning and root pruning. Branch pruning should be done when
spring starts and you should carefully remove the branches that you do not want. Keep only the branches you wish to. Similarly root pruning should be done but take care
because root pruning should only be done after the roots of the tree have bound themselves firmly into the pot. You have to learn the basics of Bonsai tree pruning before
trying to sculpt the tree into different shapes.

Tip 5 -- Choosing the Perfect Growing Environment for Your Bonsai Tree

The last tip is another important factor in indoor Bonsai Tree care. Make sure your Bonsai tree is placed in an area that receives a lot of sunlight. One of the best places in
the house is the window sill but make sure it is wide enough to hold the Bonsai pot or else it will fall off! The room should not be too hot or cold, and this varies from one
species of tree to another. In addition, take care that the room is humid enough so that the soil does not dry out too soon.


This Document covers the 5 basic points of indoor Bonsai tree care. If you follow the advice listed here, you will soon be growing a beautiful Bonsai tree that will be the envy of the neighborhood!

Thursday 26 September 2013

Choosing the right pot for your bonsai.

                         
                       Choosing the right pot for your tree


Choosing the best pot for a particular tree is not easy. As well as the more mundane factory-made Chinese and Korean pots there are a number of bonsai potters and potteries throughout the world that are able to offer individual and diverse pot designs and glazes to the enthusiast. There are so many available colours, sizes and designs that it can become very difficult to identify exactly which one(s) are best for your tree.
Pot choice is also subjective, ultimately some of the final decision will be made according to your own personal tastes. Some enthusiasts prefer more conservative pot shapes, textures and glazes, other enthusiasts prefer to make more unusual 'individual' choices.
In an effort to help choose the correct 'type' of pot for your tree I have asked Vic Harris to help me draw up some basic guidelines when choosing a new pot for your tree.
To arrive at a good decision, it is useful to break down the choices into 4 parts. Pot dimension, pot shape, pot colour and Texture
Choice 1: Pot Dimensions
The first thing to consider is the size of the pot that you will need. The correct pot dimensions can be achieved using some basic rules according to the dimensions of the tree itself.
The general rule of thumb is that the pots depth should be equal to the diameter of the trunk just above soil level.
For oval or rectangular pots, the length of the pot should be 2/3 the height of the tree.
For round pots, the diameter of the pot should be 1/3 the height of the tree.
For trees with especially wide canopies a wider pot can be necessary and this can be compensated by using a slightly shallower pot.
As equally, a tree with a very thick trunk (in comparison with the height of the tree) may suit a slightly deeper but narrower pot.
It should be remembered that these guidelines are based on aesthetics only. For horticultural reasons, some tree species require larger or smaller pots. Species with very fast growing roots such as Trident Maples often require deeper pots whilst flowering and fruiting species such as Crab Apples require more root run and therefore deeper pots.
Choice 2: Pot Shape
The style of pot that you choose will need to harmonise with the tree.
You need to take a look at your tree and evaluate it's characteristics. Try to decide whether your tree is masculine or feminine. Many trees are a combination of both although usually one is dominant than the other. This is very subjective; for some people a tree may be masculine, for others, it might be feminine. Ultimately as the owner of the tree it is for you to decide. It should be noted though that a firmly masculine tree will never look right in a very feminine oval pot; in turn a feminine tree will always look awkward in a masculine pot.
What makes a tree feminine or masculine?
A masculine tree gives an impression of strength, it might have a heavily tapered trunk, have craggy, mature bark, strong angular branching, it may have deadwood. It may have a straight, powerful trunk or a dense canopy.
A feminine tree will have a more delicate appearance, a smooth trunkline, smooth bark, sinuous movement in it's trunk and branches. A light canopy and slow taper.
Some tree species are predisposed to being considered feminine or masculine; Pines or angular Hawthorns are often considered masculine whereas delicate Japanese Maples will be considered as naturally feminine.
However, a strong, heavily tapered Japanese Maple with delicate leaves and branching could be considered to be a feminine species with masculine features, whilst a tall Hawthorn with craggy, rough bark, gentle curves and very gradual taper could be considered a masculine species with a feminine characteristics. With trees such as these it is necessary to identify which is the strongest feature and reflect it. Is it the craggy, fissured bark of the hawthorn or the gentle curves of the trunk that have the strongest visual impact? Is it the delicate branching of the Maple or the powerful tapered trunk that attracts your eye most?
Fortunately, it is possible to find pot designs that can reflect both femininity and masculinity.
Pots are considered feminine or masculine. Deep pots with strong angular features are considered masculine whilst more feminine pots are shallower with softer lines.
For instance, strong chunky, deep rectangles with sharp corners are very masculine pots, as are square pots. These are suited to thick heavy trunked masculine trees, especially conifers.
For thick-trunked deciduous trees, the corners of the rectangle can be rounded thus reducing the masculinity of the pot a little.
Working down through the scale of masculinity, deep chunky ovals come next and then we have drums/round pots that are androgynous i.e are suitable for a masculine or feminine tree.
After this we move into the feminine pots which are shallow delicate ovals and very shallow round literati pots.

Pot Shape Basic Guidelines
Rectangular pots are suitable for coniferous species and big deciduous trees with very pronounced taper, wide base, heavy buttressed nebari. These are used for masculine trees to add a feeling of strength in the tree

Oval pots Suitable for reflecting the femininity of deciduous trees, clump style bonsai, groves and forests. The less taper the tree has the more feminine it tends to become, sinuous curves can also dampen the masculinity of a tree.

Round. Suitable for coniferous or deciduous feminine trees, particularly (but not exclusively) for literati/bunjin trees. Tall straight or sinuously curved trees with very little taper are the most feminine and the pots that tend to suit these trees are very shallow rounds.
Pot Lip or Rim
A lip on the upper rim gives additional strength to a masculine tree.
A straight rim is softer for more androgynous trees
A bowl/convex side is more suited to feminine trees
Pot Corners
Sharp, right-angled corners are masculine and suitable for masculine trees
Indented corners on a rectangular pot soften the masculinity of a pot.
Rounded corners softens the pot further, beginning to resemble a oval pot and more suitable for masculine deciduous trees

Feet of pot
The main purpose of feet on a bonsai pot is to allow for good drainage and airflow, but feet can also be used to change the pots appearance.
Feet can be subtle and decorative or strong and robust.
These qualities can be used to influence the over all feel of the pot, big chunky feet can add strength to the design and understated delicate feet will have the opposite effect.


Choice 3: Pot Colour
Once you have decided on the shape of the pot, next you need to think of the colour and texture.
Every tree is unique, although it is possible to generalise about a particular species, each individual tree will have something to pick up on as no two trees are exactly the same and there are always small variations that can be brought out in the pot colour and texture.
The colour of the pot can be used to pick up on a feature of the tree and therefore helps the tree and pot colour 'work' well together. The colour in the tree that is complimented can be that of the bark, for instance an unglazed red/brown pot picking up the bark of a Juniper. It can compliment the colour of the leaves through the summer or the autumn colour. On fruiting or flowering trees, the colour of the pot can be used to compliment the colour of the flowers or the berries.

Pot Examples
bonsai pot

A very masculine pot with sharp corners, strong feet and a rough texture. This pot would suit thick trunked pines. The dark brown/rusty textured unglazed finish would compliment the rough bark of most coniferous trees.
bonsai pot
Slightly less masculine pot. Soft cornered rectangle, no lip , inconspicuous feet, this pot with it's blue / gray glaze would suit a heavy trunk Acer.
bonsai pot
This pot although an oval still has some masculine qualities, it is deep and has a strong outward square lip. With its red / pink glaze this pot would suit a flowering tree with a heavy trunk such as an Azalea.
bonsai pot
Next we have a drum, suitable for masculine or feminine trees. With this grey glaze, this particular pot would suit a Hawthorn, Oak or even a European Larch.
bonsai pot
Here we have a feminine oval with a very gentle curved profile and a cream / beige glaze, any of the lighter coloured more delicate trunk deciduous trees, with smooth bark would look good in this pot, acers, beech, ash.
bonsai pot
Lastly, we have a shallow round literati style pot, although this a feminine style, often the trees used for this style have masculine features i.e rough bark and this is taken into account by adding a rough texture to the pot. This pot would suit literati style junipers and pines with the rusty browns and verdigris unglazed finish.

Examples of pot colour combination with bonsai by Harry Harrington
spiraea bonsai
Spiraea, Generally group or multiple trunk bonsai suit shallow pots, these types of pot give a sense of space and help to create perspective and depth. This pot picks up on the colour of the bark with a very close match of colours, I also felt that it would be nice to emphasise the contorted trunks with movement in the pot.
larch bonsai
European Larch. This pot is unglazed and coloured with layers of grey and brown slip. This has given the pot a finish that is very close to colour and texture of the bark.
acer bonsai
Acer palmatum/ Mountain Maple. Here we have a delicate feminine oval pot with a subtle off white glaze which is quite understated and compliments the varying colour phases of this trees foliage through out the year.
privet bonsai
Privet. Here we have something that is a bit out of the ordinary, Harry and I worked closely on the design for this pot together. Harry saw a twisted nightmare scene in the contorted exposed roots of this bonsai. Even though this pot makes a strong statement, it completely harmonises with tree. The colours and texture are a perfect extension of the tree .
hawthorn bonsai
Here we have a cascade Hawthorn. The was designed with carved portion to the front to mimic a rocky cliff or mountainside which the sort of terrain where this style of tree would be found growing naturally.
Although you generally want the colour and texture of a pot to match some characteristic of the tree, sometimes contrasts can work very well, for example, the red leaves of a red-leaved trees work well with a blue pot.
The colour can also be used to accentuate the energy of the tree. Warm colours such as browns, reds, oranges and yellows provide a feeling of warmth and stability to the tree whereas cold colours such as blues and greens can balance and refresh the overall composition.
Warm and cold colours can be used to contrast with a bonsai. Warm colours can be used for tiny (mame-sized) bonsai to exaggerate their colour whereas cool colours can be used to tone down bright-leaved species.

Basic Guide to Tree/ Pot colour combinations
This is a very basic guide designed to be a starting point or general guide to colours that can be suitable for any given tree and of course the final choice can be altered to suit the individual characteristics of any given tree.
Light browns/Oatmeals-
Acer, Elm, Beech,Oak,Larch,Hawthorn,Ash ,gingko

Off whites/Grey's-
Hawthorn,Oak,Acer,Ash
Light greens
Acer, ash ,beech
Dark greens
Acer, Azaleas, Chinese elm, cotoneaster
Medium Browns-
Elm,Birch ,Mountain Ash, Acer

Dark Browns/Red Browns/Unglazed Reds/Browns
Pine,Juniper,Cotoneaster,Larch and other conifers,Azaleas
Light blue
Azaleas, Malus and other flowering species

Matt Blues-
Acer,Juniper,Pine,Azaleas

Matt Blue/Greens-
Pine,Junipers,Acer, Azaleas (this combination will also suit just about any tree as they are the colours that you see most trees framed by when in their natural state )

Choice 4: Pot Texture
Textures in a pot are again used to compliment a tree. Smooth clay finishes are suitable for more feminine trees whereas heavily textured pots bring out the masculinity and wildness in a tree.

Texture examples

bonsai pot
This pot is very textured, it has a very coarse, gritty feel to it and would be suitable for most pines.
bonsai pot

This pot has a smooth glaze but lots of texture added to the lower portion of the pot, this is an interesting way of adding texture to a pot and mirrors the composition of the tree itself, with the glaze complementing the foliage and the unglazed portion picking up on the trunk and this pot would suit semi cascade style junipers or pines
bonsai pot

This pot has texture within the glaze itself, the sort of softer textures found in some deciduous trees that develop subtle texture as they mature. Trees like beech, oak, mountain ash.
bonsai pot

This pot is very smooth and has quite gentle feminine feel to it and would suit Acers, beech or ash
Conclusion
As can be seen in this article, choosing the correct pot is not simple but it can be learnt. Ultimately, a combination of personal tastes, knowledge and experience makes the process much easier.
When buying pots for your bonsai try to make sure you know the pot measurements needed for a tree. It is no good buying a suitable pot only to find it is too big or small for your tree.
Have a good idea of the shape that will suit the masculinity or femininity of your tree.
Have a good idea of the colours and textures that will suit your tree.
Don't be embarrassed to ask the advice of the bonsai nursery or the potter you are buying from, an experienced potter or bonsai nursery will always be able to give you a choice of suitable pots to choose from. However, always try to have a picture of your tree to hand as this makes the nursery or potter's job much, much easier!

Monday 23 September 2013

Taking care of indoor Bonsai


                                     Taking care of your indoor bonsai


With proper care, your bonsai will remain healthy, beautiful and miniature for many years to come. Since your bonsai is a living miniature tree, it will increase in beauty as it matures through the years. The instructions below are just the basics and, therefore, we recommend that you purchase one of the many fine books available on the subject.


PLACEMENT SPRING, SUMMER & FALL
When nightly lows do not dip below 40 degrees, your bonsai should be placed outside, such as on a patio, balcony, terrace or in a garden. Once outside, your bonsai should be positioned where it will receive sufficient sun -- morning sun and afternoon shade is best. A bonsai can be viewed best when it is placed approximately three to four feet high (eye level), such as on a table, wall or bench.

PLACEMENT WINTER
Once nightly lows begin approaching the 40 degree mark, it is time to bring your indoor bonsai inside. The ideal indoor location is on a window sill facing south. An east or west exposure is second best. A northern exposure will work, but will necessitate the use of "grow lights" to provide sufficient light to keep your bonsai healthy. Four to six hours of sunlight per day should suffice. If you can provide more, so much the better.
WATERING
The watering of your bonsai must never be neglected. Apply water when the soil appears dry -- never allow the soil to become completely dry. If your bonsai is receiving full sun, it may be necessary to water once a day. This schedule may vary with the size pot, type of soil and type of bonsai tree you own. Evaluate each tree's water requirements and adjust your watering schedule to accommodate it. It is a good idea to use a moisture meter until you get to know the requirements of your bonsai tree. Watering should be done with a watering can or hose attachment which should dispense the water in a soft enough manner as not to disturb the soil. Water should be applied until it begins running out of the holes in the bottom of your pot. A good rain is usually a sufficient watering.

HUMIDITY
During the cold months, when your bonsai is inside, we recommend placing it in a shallow tray filled with a layer of gravel with water added. This provides extra moisture around the tree as the water evaporates and reduces the amount of moisture lost to modern heating systems.

FERTILIZING
Fertilizing is also necessary if your bonsai is to remain healthy and beautiful. Since your bonsai is growing in such a small amount of soil it is necessary to replenish the soil's supply of nutrients periodically. Any general-purpose liquid fertilizer will do fine and is available at most garden centers. We suggest that fertilizers be used at half their recommended strength. Fertilizer should be applied at least once a month except during winter. Your bonsai will also respond well to foliage feeding, with a water-soluble fertilizer applied every other month as a spray.

TRAINING
This brief explanation of basic care does not cover training. Training deals with the art of bonsai and should be thoroughly understood before undertaking -- or left to a professional. However, most of the true bonsai trees you find have already been through their training period, thus requiring only periodic trimming and pinching to remain miniature.

TRIMMING & PINCHING
Trimming and pinching keep your tree miniature. Pinch and trim back the new growth to the farthest safe point. Never should all of the new growth be removed. A little should be left to sustain the health of the tree. Tropical and sub-tropical trees used for bonsai will require periodic pinching and trimming throughout the year. Since different trees grow at different rates, it is necessary to evaluate each tree’s rate of growth and adjust your trimming and pinching to accommodate it.

RE-POTTING
  Re-potting must be performed periodically on all bonsai when their root system has filled the pot. The reasons for re-potting are to supply your tree with fresh soil, and to encourage a more compact root system. As a rule, most deciduous trees require re-potting every two or three years, while evergreens only need to be repotted every four or five years. Since trees grow at different rates, this schedule will not always hold true, therefore, you should examine your tree's root system each year to determine if it has become pot-bound.
In most cases, the potting process is easy and safe if performed properly and at the right time of the year. Re potting should be done in mid-summer. The tree, along with all of its soil, should be removed from the pot. The outer and bottom most fourth of the tree's root mass should be removed. This is done by raking the soil away, then pruning back the roots. In most cases, it is not good to prune back more than one fourth of the tree's root mass. After this, the tree can be placed back in its original pot or into another. The pot should have screen placed over the drainage holes. Then a thin layer of small gravel is placed in the bottom of the pot for drainage purposes. On top of this gravel is placed the new fresh soil. Place a layer of well-draining soil which is sufficient enough to elevate the tree to its previous height in the pot. After placing the tree back in the pot, the area left vacant by the pruned root mass should be filled in with fresh soil. This fresh soil should be worked in around and under the root mass in such a manner as to avoid leaving any air pockets. After re-potting, your bonsai should be thoroughly watered. This can be achieved by submerging the entire pot in a tub of water. Moss or other ground covers can be used to cover the surface of the pot to help prevent soil erosion when watering.

INSECTS & DISEASES
Since your bonsai is a tree in miniature, it can be treated for insects and diseases the same as any other tree. If you discover any insects or diseases, visit our website where you will be able to obtain the necessary products to eliminate the problem.

Tuesday 17 September 2013

Bonsai

 - The art of growing small trees and plants.
Bonsai are small trees planted and cared for in containers or pots. Many people grow bonsai because of their beauty and the enjoyment of maintaining them. Every bonsai starts as a seedling, or a very small tree. The owner then cultivates the branches over a long period of time, and the bonsai takes on a unique shape. Finally, when the tree reaches its planned shape, the bonsai is transferred to a display pot. Sometimes small objects or figurines are placed around the bonsai based on the artist's vision of the complete sculpture.

Bonsai history

The practice of growing and caring for bonsai began more than 1,000 years ago in Japan. Mentions of bonsai appear frequently in ancient poetry and other writings. Bonsai that were started as long ago as the 17th century have survived to present times and are considered national treasures in Japan.

Caring for Bonsai became much more widespread by the end of the 18th century. Members of the public began growing Bonsai, and showings and competitions were held. Today, more than 1,200 books have been published on Bonsai, in at least 26 languages. It is estimated that more than 5 million people worldwide cultivate Bonsai.

Bonsai types

A few popular types of Bonsai are:
A formal upright Bonsai has a straight, tapering trunk, with branches that are thick and broad at the bottom, and fine and short at the top.
An informal upright Bonsai features visible curves in the trunk and branches. The apex is located directly above the point where the trunk enters the soil line.
Slant-style Bonsai also have straight trunks, but the trunk emerges from the soil at an angle, and the apex is to the left or right of the root base.
Cascade-style Bonsai take the form of trees that grow down the sides of mountains or over water. The apex of a full cascade-style Bonsai falls below the base of the pot.
These are just a few examples of types of Bonsai. Consult an expert to determine which variety is right for you and the climate where you live.

Species of  Bonsai trees


Juniper - Junipers are popular among bonsai growers who like to control size and shape. During the growing season, a Juniper may need finger pinching two or three times throughout the tree to ensure it stays compact and space is maintained between branches. Finger pinching can be done with tweezers, but many growers prefer to use their fingers to better understand the tree.

Pine - Pines flourish in full sun throughout the year and should be kept regularly moist. Keep pines out of heavy rain, however. The grower should regularly remove old needles and pinch new pine candles to keep the tree its desired size and shape. Keep a careful watch for aphids that can damage pines.

Elm - Chinese elm are popular with new bonsai growers because they are among the easiest to keep, and they have small leaves.They can be kept indoors or outdoors, as long as the grower hardens the tree before it is placed in the cold. Elm varieties can develop very strong aerial root systems and thick trunks. Chinese elm are popular among growers who favor the broom-style bonsai.

Oak - Oak bonsai are popular among growers who want to make miniatures of mature, full-grown trees.Careful attention to branches, roots and the pruning process is a must when working with oak bonsai. You will also want to check if oak bonsai are compatible with your climate. Be on the lookout for mildew on oaks, and treat it immediately with a systemic fungicide.

Spruce - A dwarf blue spruce bonsai is a good selection for a grower who wants to create a tree in the upright style. Dwarf spruce are also popular with growers who want to develop carving and wiring skills while the tree is still in a training pot.

Maple - Maples grow very quickly in the spring. This variety can be left to grow a few inches to keep its spring color, and it can be pinched regularly. Some bonsai growers leaf-prune maples in June to reduce the leaf size, but don't do this more than once per year, and only on a healthy tree. The Japanese maple, or Acer, is well-known for changing colors with the seasons. Growers can expect reds, pinks, yellows, and greens.

Indoor Bonsai

Traditionally, Bonsai are grown outdoors. But in climates where outdoor growing is impossible and the hobby is less formal, indoor growth frequently takes place. Indoor growers frequently choose tropical and sub-tropical species that can grow inside. Outdoor trees are likely to weaken and die if the owner tries to move them indoors. Few traditional Bonsai species can survive in a typical home because of the dry conditions. Some Bonsai growers in Japan will sometimes display their tree in their home for a day or two only in a formal display alcove known as a Tokonoma.

Outdoor Bonsai

A typical container for a Bonsai living in the outdoors is under 25 centimeters in length and from 2 to 10 liters in volume. Bonsai are rarely larger than one meter in height, and many are much smaller. The owner should ensure the Bonsai received the correct amount of water, and re-pot the tree when necessary. Consult an expert to determine the correct soil composition and fertilization. In most cases, the soil the Bonsai is planted in should be a loose, fast-draining mix of components. Also be aware that different types of the tree have unique lighting requirements.

Bonsai tree care

To effectively grow a Bonsai, the owner must understand techniques related to defoliation, grafting, potting, pruning, and root reduction. The owner should regularly trim the leaves and needles of the Bonsai, both to keep it healthy and to achieve the desired shape. The trunk, branches and roots of the tree should be carefully pruned. Many Bonsai owners use wiring to shape the tree and make detailed branch and leaf placements. Clamps can also be used to shape trunks and branches. Growing a new bud, branch or root can be be accomplished by grafting the new material in a prepared area on the trunk or under the bark of the tree.

Bonsai pots and Bonsai containers

Once a bonsai is the right size and shape to display, it's time to carefully select a pot or other type of container. Final pots are usually much shallower than training pots, which are deeper so that the bonsai has a better chance of growing.Most final display pots are ceramic, but plastic or mica pots can also be used. 

Bonsai growers should consider taking their tree with them when buying a pot or container, to ensure they are buying a pot of correct size, color and shape. Brown, unglazed pots are popular for evergreen bonsai that still have foliage in the winter. A colored glaze pot works well with a deciduous bonsai, because its colors work equally well in summer and winter.

Don't overlook the shape of a bonsai when selecting a pot or container. A semicascade tree requires a pot that keeps branches off the ground. Cascade bonsai need taller pots that are appropriate for a stand or a location overhanging a pond. Forest group enthusiasts frequently purchase shallow oval or rectangular pots.

Bear in mind the thickness of the tree's trunk when selecting a pot. Thick-trunked trees work well in a deep pot, while taller bonsai are better off in a wider, shallower pot.

Bonsai compost and fertilizers

Bonsai require very open and free-draining compost that ensure the root ball will not become too wet. A root ball that is too wet frequently causes it to rot, harming the tree. When using a spray bottle, keep the nozzle about two feet from the bonsai for best results.

Keeping a bonsai healthy requires a careful schedule of watering and feeding, depending on its type. Most indoor trees require a proprietary liquid bonsai feed administered about every two days during the spring, summer and fall, and once a month in the winter. Outdoor trees generally do not require feeding during the winter.Normal garden fertilizers should be diluted to a weaker strength when used with bonsai. Cake-type fertilizers that are left on top of the pot can also be used to gradually fertilize the tree.

If possible, use rainwater to water bonsai. If you are concerned about the chemicals and salts in the tap water where you live, store some tap water in a water butt for a few days to make it suitable for bonsai.

Bonsai tools

Beginning bonsai growers should start with small and large scissors for trimming roots and small branches. Beginners should also purchase wire and cutters to begin learning shaping skills and to create the shape of the bonsai. Buy a water sprayer for keeping roots and foliage moist.

Later, bonsai growers will need a rake or root hook for re-potting jobs. Moving trees around a garden will require a good-quality shovel, saw and loppers.Some other tools that may be useful depending on what kind or bonsai you wish to grow include a coconut brush, branch or side cutters, and a bench cutter.

As a grower becomes more advanced, they should consider clamps and pliers for bending thick branches.Tools that will help cultivate soil include soil sieves for removing fine material from compost and improving drainage. Metal scoops allow the grower to pour grit and pot compost into small areas.Some bonsai growers set up a special work station with a turntable so they can view trees easily from different angles.

Monday 16 September 2013

TIPS TO CARE FOR YOUR FICUS BONSAI

          
Growing your Ficus Bonsai
Ficus bonsai are ideally suited for indoor bonsai. There are many different varieties that are natural dwarfs. These varieties have very small leaves and slow growth habits. There are many varieties of Ficus including narrow-leaf Ficus, dwarf Ficus, and weeping Ficus. Ficus bonsai should be kept indoors all year round. With a few simple guidelines your Ficus bonsai can be grown without difficulty.
Growing your Ficus Bonsai
Watering
Ficus bonsai, as with most bonsai, like to dry out between watering's. Feel the soil every day. If there is a rock in the planting lift it up and feel under it, otherwise, just stick your finger about a half of an inch to an inch into the soil. If the soil feels dry, water your bonsai. Never let your bonsai go totally dry for extended periods!!! The best way to water your bonsai is to soak it in a sink or container of water up to the trunk for about 5-10 minutes. Then allow it to drain. If top watering your bonsai, water, wait a few minutes, and water again. Repeat this several times to insure that your bonsai has received a thorough watering. Eventually you will be able to determine a watering schedule that meets your climate conditions..

Light
Ficus bonsai grow well in either direct or indirect sunlight. We prefer to grow Ficus in shady areas, out of the hot afternoon sun. Sometimes the direct afternoon sun can burn delicate leaves, especially when shining through a household window. Direct morning sunlight is great for almost all bonsai because of its low intensity. We have also found that most types of Ficus grow well under supplemental lighting sources, such as grow lights.
 
Growing your Ficus Bonsai

Feeding Fertilize your Ficus bonsai once every two weeks during the growing season, spring until fall. We recommend using an organic liquid fertilizer such as a fish emulsion or an organic seaweed fertilizer. Chemical fertilizers may be used but should be diluted to approximately one half strength so that valuable roots are not damaged. Organic pellets such as rice cakes may also be used along with regular fertilizers.
Humidity
Humidity around your Ficus bonsai may be maintained by the use of a humidity tray or plate filled with stones and water. Your bonsai can be placed on top of the stones in the tray. The tray or plate will also offer protection from the draining water of your freshly watered bonsai. Misting once a day will also help...but remember that misting is not a replacement for watering.
Repotting
Ficus bonsai should be repotted about every two years, although they should be checked every year. The best time to repot Ficus is in the early spring. After repotting, water thoroughly and keep the plant in a shady location for several weeks so that new roots may grow.
Growing your Ficus Bonsai

Winter Care
Ficus bonsai should be kept indoors during the winter months. Display them in a sunny spot that does not go below 60 degrees Fahrenheit. Some leaf drop may occur if the temperatures are too cool or if your Ficus bonsai is placed in a cold drafty environment, such as a location close to an outside door. Although some leaf drop is normal, measures should be taken to protect your Ficus from the cold.
Growing your Ficus BonsaiMoss
Moss is certainly not essential to growing bonsai, but when moss is added to a bonsai it both enhances its beauty and improves moisture retention within the bonsai pot. If your bonsai has moss growing in it you can help to keep it alive by misting it regularly. If the moss dies, you may replace it with some of your own moss from your backyard.
Endnote
These instructions, when followed properly, will help keep your bonsai healthy and beautiful. There are many more publications available that offer more in depth information about your bonsai and we encourage you to read some of them. There are also local bonsai clubs and societies that offer many great learning experiences in the area of bonsai.

Friday 13 September 2013

TIPS TO CARE FOR YOUR JAPANESE JUNIPER

TIPS  TO  CARE  FOR  YOUR  JAPANESE  JUNIPER


The Japanese juniper tree (Juniperus procumbens) is an evergreen shrub that works well in borders, topiaries, rock gardens and areas where erosion control is needed. Japanese junipers grow outdoors in U.S. Department of Agriculture plant hardiness zones 4 through 9, but are planted frequently in containers and used as bonsai trees. As bonsais, these shrubs will grow anywhere, since the portable nature of these small plants makes it easy to overwinter them indoors in cold climates and force them into winter dormancy in warm ones.

The following is a list of tips to care for your juniper bonsai indoors and out and during winter and summer. All Yoji Bonsai trees are potted with the correct mixture of soil that is paramount to the success and long life your bonsai tree. You not only get beauty with Yoji Bonsai trees but you also get quality. Enjoy.
1
Place the juniper bonsai outdoors in a bright spot where it will get direct sunlight in the morning, but filtered shade during the hottest part of the day. Move the plant inside for the winter when the temperatures begin to drop consistently to freezing. Place it in a bright, well-ventilated room where the temperature will stay between 25 and 45 degrees Fahrenheit. Move the plant back outdoors for the summer when the temperature outside exceeds 40 degrees. Mist the plant with water or place it on a tray of pebbles and water if it is overwintering near a heat source or in a dry area.

2

Poke your finger into the soil around your bonsai tree every day, pushing it about ½ inch into the soil. If the soil feels dry, water the tree by placing it into a container of standing fresh water for five to 10 minutes. Check your plant less frequently once you learn how often it needs to be watered in your environment. The top of the soil should dry out between watering's, but the soil in the pot should never be allowed to dry out completely. Remember to water your bonsai periodically during its winter dormancy, when water consumption will lessen but not stop completely.

3

Feed the tree every two weeks in the spring and summer growing season, starting as soon as your tree produces new growth in the spring. Fertilize once every two weeks with an organic fertilizer, such as fish emulsion, or with a balanced commercial fertilizer diluted to half strength. When the tree’s growth slows in late summer, cut the feedings to once a month. Do not fertilize the plant during winter dormancy.

4

Prune your juniper bonsai in the spring by pinching back new growth at the top of the tree that will ruin the desired shape of the plant. Pinch off needles growing against the trunk as well. Pruning specifics will vary based on the shape and style of tree that you want, and bonsai pruning can be difficult, so consult a professional if you are new to bonsai and are unsure how to proceed. Junipers are good candidates for cascade, windswept and informal upright bonsai shapes.

5

Repot trees that are less than five or six years old once every two years. Older plants need repotting only once every three to five years. Repot the plants in the spring when new green buds appear on them. Keep newly potted juniper bonsais in a shady area for a few weeks after transplanting so the roots can recover.

6

Be on the lookout for juniper-loving spider mites. If you see them, rinse the tree’s foliage with warm water and spray it weekly with a mild insecticide containing rotenone pyrethrin for three weeks. If the mites still are present after treatment, treat the tree again.

Things You Will Need

  • Spray bottle
  • Balanced fertilizer
  • Pot
  • Bonsai potting mix
  • Rotenone pyrethrin insecticide

Tip

  • If it is easier, water your juniper bonsai tree from the top down with a hose or watering can. If you do, soak the soil thoroughly, allow the water to drain out of the bottom of the pot, wait a few minutes and water again. Repeat this several times.